なぞのブログの方と連動だが、こちらにも掲載。
AndroidにはTTSという機能がある。で、これを使ってしゃべらせる。それだけ。
標準でインストールされているのは英語等しかないので、日本語TTS用のエンジンが必要。N2 TTSでもAquesTalkでも、日本語用のやつをセットアップしておこう。
なお、コード自体はほとんど参考にさせてもらったサイトの流用だが、以下の部分は変更している。
さて、いってみよう。
<?xml version="1.0" encoding="utf-8"?>
<LinearLayout xmlns:android="http://schemas.android.com/apk/res/android"
android:orientation="vertical"
android:layout_width="fill_parent"
android:layout_height="fill_parent">
<Button
android:id="@+id/Button_s"
android:layout_width="fill_parent"
android:layout_height="wrap_content"
android:onClick="onClick"
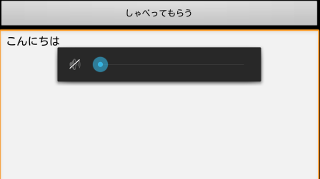
android:text="しゃべってもらう" />
<EditText
android:id="@+id/editor"
android:text="こんにちは"
android:layout_width="fill_parent"
android:layout_height="300px"
android:gravity="top"/>
</LinearLayout>
元サイトの記事とほとんど変わらないんだけど、ボタンのところに onClick="onClick" 定義を追加しているのがわかってもらえると思う。僕は「このボタンを押すとこうなる」っていうのはデザインの範疇だと思っている人なので、ここに書きたい人なのだ。
でも、それが正しいかどうかは知らない。
さて、次にmanifestファイルにいこう。
<?xml version="1.0" encoding="utf-8"?>
<manifest xmlns:android="http://schemas.android.com/apk/res/android"
      package="speech.test"
      android:versionCode="1"
      android:versionName="1.0">
    <application android:label="@string/app_name" android:icon="@drawable/ic_launcher">
        <activity android:name="MainActivity"
                  android:theme="@android:style/Theme.NoTitleBar"
                  android:label="@string/app_name">
            <intent-filter>
                <action android:name="android.intent.action.MAIN" />
                <category android:name="android.intent.category.LAUNCHER" />
            </intent-filter>
        </activity>
    </application>
    <uses-permission android:name="android.permission.INTERNET"></uses-permission>
<uses-permission android:name="android.permission.RECORD_AUDIO"></uses-permission>
</manifest>
@android:style/Theme.NoTitleBar という部分に注目。ここでタイトルバーを消している。
あと、ネットアクセスはともかくRECORD_AUDIOは今夜はたぶんいらないと思うが、とりあえず放置。
そしていよいよ、メインのソースコードだ。
package speech.test;

import android.app.Activity;
import android.os.Bundle;
import android.speech.tts.TextToSpeech;
import android.speech.tts.TextToSpeech.OnInitListener;
import android.view.View;
import android.view.View.OnClickListener;
import android.widget.Button;
import android.widget.TextView;
import android.widget.Toast;

public class MainActivity extends Activity  implements OnInitListener, OnClickListener {

    private TextToSpeech tts;

    @Override
    protected void onCreate(final Bundle savedInstanceState) {
        super.onCreate(savedInstanceState);
        setContentView(R.layout.main);
        tts = new TextToSpeech(getApplicationContext(), this);
    }

    @Override
    protected void onDestroy() {
        super.onDestroy();
        tts.shutdown();
    }

    @Override
    public void onInit(int status) {
        if (status == TextToSpeech.SUCCESS) {
            tts.speak("たぶん行けます", TextToSpeech.QUEUE_FLUSH, null);
        } else {
            Toast.makeText(getApplicationContext(), "なんかエラーな感じです。", Toast.LENGTH_LONG).show();
        }
    }

    @Override
    public void onClick(final View v) {
        TextView TextView4speech = (TextView) findViewById(R.id.editor);
        tts.speak(TextView4speech.getText().toString(), TextToSpeech.QUEUE_FLUSH, null);
    }
}
オリジナルに比べて、ほんのちょっとだけ短いのがおわかりいただけるだろうか?
こっちでボタンに機能を割り付ける必要がないので、そのぶんの定義がないのだ。まぁ、代わりにToast呼び出しを追加しているけど、そっちはたったの一行だしね。
TextToSpeech.QUEUE_FLUSHとかの細かい話は、次回にしよう。
うん。
うちなんぞよりずっと丁寧な記事です。是非ご参照あれ。